The Nurture Right 360 Incubator is a digital, user-friendly device designed for optimal egg hatching. It features automatic egg turning, precise temperature control, and a built-in egg candler for monitoring embryo development. Suitable for both beginners and experienced breeders, this incubator supports high hatch rates and is ideal for hatching chicken, duck, and pheasant eggs. Its advanced features and 360-degree visibility make it a popular choice for home incubation, ensuring a successful and hassle-free experience.
1.1 Overview of the Incubator and Its Features
The Nurture Right 360 Incubator is equipped with cutting-edge features for successful egg hatching. It includes automatic egg turning, digital temperature, and humidity displays, ensuring precise control. The incubator also features a built-in LED candler for monitoring embryo development and 360-degree visibility for easy observation. Designed for convenience, it supports high hatch rates and is suitable for various poultry eggs. Its user-friendly interface and durable construction make it an ideal choice for both novice and experienced breeders, providing a reliable and efficient hatching experience.
1.2 Importance of Proper Incubation for Egg Hatching
Proper incubation is critical for successful egg hatching, as it ensures optimal conditions for embryo development. Maintaining precise temperature, humidity, and egg turning schedules prevents developmental issues and increases hatch rates. Even minor deviations can lead to poor outcomes, such as malformed chicks or failed hatches. Consistent care promotes healthy growth, making the Nurture Right 360 Incubator an essential tool for achieving high success rates in poultry breeding and egg hatching.

Unboxing and Inventory of the Nurture Right 360 Incubator
The Nurture Right 360 Incubator comes with a base, top, water pots, and accessories; Ensure all components, including the power cord, are present before assembly begins.
2.1 Components Included in the Box
The Nurture Right 360 Incubator package includes a base, incubator top, water pot A with a cover, and water pot B without a cover. Additional components are an egg tray, power cord, and instruction manual. Ensure all parts are present upon unboxing, as missing items like the power cord may be hidden under the base or incubator. Verify the condition of each component to guarantee proper functionality before setup. This ensures a smooth and successful incubation process from the start.
2.2 Checking for Missing Parts
Upon unboxing the Nurture Right 360 Incubator, inspect all components carefully. Ensure the base, incubator top, water pot A (with cover), water pot B (without cover), egg tray, and power cord are present. Verify the power cord is not hidden under the base or incubator. Check for any damage or defects. Refer to the instruction manual for a detailed list of included items. A thorough check ensures no parts are missing, preventing delays in setup and guaranteeing a smooth incubation process from the start.
Initial Setup and Preparation
Place the incubator in a stable environment (74-80°F) and prepare components. Fill water pot A, open the grey air vent halfway, and connect the power supply properly.
3.1 Preparing the Incubation Environment
Place the incubator in a room with stable temperatures between 74-80°F. Avoid drafts and ensure the environment is free from extreme temperature fluctuations or vibrations. Fill water pot A as instructed and open the grey air vent halfway for proper humidity. This setup ensures optimal conditions for embryo development and hatching success.
3.2 Assembling the Incubator
Begin by placing the incubator base on a stable surface. Plug the egg turner cord from the base into the socket on the incubator top. Connect the power supply unit to the incubator top, ensuring it is securely attached. Carefully place the incubator top onto the base, making sure the clear viewing window is fully closed. Align all components properly to ensure smooth operation. Double-check that no parts are missing and refer to the manual for any specific assembly requirements.

Egg Preparation and Placement
Properly clean and store eggs before incubation. Select eggs with no cracks or damage. Place them in the incubator, ensuring correct orientation for optimal hatching conditions.
4.1 Selecting and Storing Eggs for Incubation
For successful incubation, select clean, undamaged eggs with no cracks or visible imperfections. Store eggs in a cool, dry place (50-60°F) with the pointed end down. Avoid extreme temperatures or humidity fluctuations. Ensure eggs are fresh, as hatch rates decline after 7-10 days post-laying. Clean eggs gently with a soft cloth or sanitizer to prevent contamination. Proper storage and selection significantly improve hatch rates and ensure healthy embryo development. Always handle eggs carefully to avoid damage before placing them in the incubator.
4.2 Placing Eggs in the Incubator
Once the incubator is prepared, gently place the eggs into the incubator tray, ensuring they are secure and evenly spaced. Position eggs with the pointed end facing downward to maintain proper weight distribution. Avoid overcrowding, as this can disrupt airflow and temperature consistency. Ensure each egg is aligned correctly in the tray to allow the automatic turning mechanism to function properly. Double-check that all eggs are firmly seated and the incubator lid is closed to maintain optimal conditions for hatching success.
Incubation Stages and Settings
The Nurture Right 360 Incubator offers precise temperature, humidity, and automatic egg turning settings. Adjustments are made digitally, ensuring optimal conditions for embryo development during incubation stages.
5.1 Setting Up Temperature and Humidity Levels
Set the Nurture Right 360 Incubator’s temperature between 99°F and 100°F for optimal egg development. Fill water pot A for humidity during the first stage of incubation. Adjust the grey air vent to regulate humidity levels, typically maintaining 40-50% for the first 18 days. Ensure the incubator is placed in a stable environment with room temperatures between 74°F and 80°F. Monitor and adjust settings as needed to maintain consistent conditions for successful hatching.
5.2 Understanding the Egg Turning Mechanism
The Nurture Right 360 Incubator features an automatic egg turning mechanism that gently rotates eggs every few hours to ensure even development. To activate, plug the egg turner cord into the socket on the incubator’s top and connect the power supply. The turner stops 3 days before hatching to allow eggs to settle. For manual turning, simply tilt the incubator gently. This mechanism mimics natural incubation by a mother, promoting healthy embryo growth and high hatch rates with minimal effort required.
Monitoring and Adjusting Conditions
Regularly monitor temperature, humidity, and ventilation to ensure optimal incubation. Use the built-in candler to check embryo development. Adjust settings as needed for consistent conditions.
6.1 Using the Built-In Egg Candler
The Nurture Right 360 Incubator features a built-in LED egg candler, allowing you to monitor embryo development without opening the incubator. Place the egg under the light, observing vein development and movement. Candling is typically done on day 7 and again a few days before hatching to confirm development. Avoid candling too frequently to prevent stressing the embryo. This feature ensures a safe, non-invasive way to track progress and identify any issues early, promoting successful hatching outcomes;
6.2 Managing Ventilation and Airflow
Proper ventilation is crucial for maintaining healthy incubation conditions. The Nurture Right 360 Incubator features adjustable ventilation ports to regulate airflow and humidity. Ensure the grey air vent is open halfway during the first stage of incubation and fully open during hatching to maintain oxygen levels. Regularly check ventilation ports to prevent blockages. Correct airflow ensures efficient removal of carbon dioxide and promotes even humidity distribution, which is essential for successful egg development and hatching.
Hatching Phase and Post-Hatch Care
During hatching, ensure water pot A is filled, and the grey air vent is fully open. After hatching, avoid cleaning the incubator immediately. Allow chicks to dry completely before moving them. Monitor their activity and ensure they are healthy and active. Proper post-hatch care ensures strong, healthy chicks.
7.1 Preparing for the Hatching Process
Before hatching, stop the egg turner and ensure water pot A is filled. Open the grey air vent fully to maintain proper ventilation. Keep the incubator at a stable temperature of 99-100°F and humidity around 70-80%. Avoid opening the incubator excessively to prevent drastic environmental changes. Once chicks start hatching, allow them to emerge naturally. Do not clean the incubator immediately after hatching; let chicks dry completely before transferring them to a brooder.
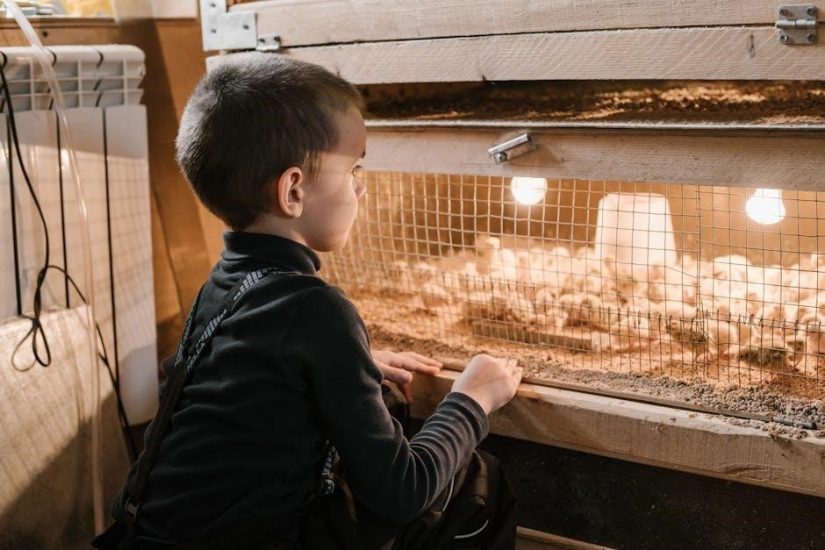
7.2 Caring for Newly Hatched Chicks
After hatching, transfer chicks to a warm, draft-free brooder with temperatures around 90-95°F. Provide fresh water and chick starter feed. Ensure proper lighting for visibility and comfort. Maintain hygiene by cleaning the brooder regularly and ensuring adequate ventilation. Monitor chick health and behavior, ensuring they are active and eating well. Avoid overcrowding to prevent stress and promote healthy growth. Follow these steps to ensure the chicks thrive in their new environment.
Maintenance and Cleaning
Regular maintenance ensures optimal performance. Clean the incubator after each use and sanitize to prevent bacteria. Dry thoroughly before storage to maintain hygiene and functionality.
8.1 Cleaning the Incubator After Use
After each use, thoroughly clean the incubator to prevent bacterial growth. Disconnect the power and wipe surfaces with a damp cloth. Use mild detergent for stubborn stains, avoiding harsh chemicals. Rinse and dry all parts, including water pots and the egg tray. Ensure the incubator is completely dry before storage to maintain hygiene and prevent mold. Regular cleaning ensures optimal performance and hatch rates in future uses.
8.2 Sanitizing and Storing the Incubator
After cleaning, sanitize the incubator with a solution of water and bleach to eliminate bacteria. Allow it to air dry completely. Store the incubator in a cool, dry, well-ventilated area, away from direct sunlight. Ensure all components, including water pots and trays, are securely packed to prevent damage. Proper storage maintains the incubator’s functionality and hygiene for future use, ensuring optimal performance in subsequent hatching cycles.

Troubleshooting Common Issues
Sanitize the incubator with a mild bleach solution after cleaning to eliminate bacteria. Rinse thoroughly and allow it to air dry. Store the incubator in a cool, dry place, away from direct sunlight, ensuring all components are securely packed. Proper storage maintains hygiene and functionality for future use, ensuring optimal performance in subsequent hatching cycles.
9.1 Resolving Temperature and Humidity Fluctuations
Temperature and humidity fluctuations in the Nurture Right 360 Incubator can impact hatch rates. Ensure the incubator is placed in a stable environment (74-80°F). Check power connections and verify sensor accuracy. For temperature issues, adjust the incubator’s settings or relocate it if room conditions vary. For humidity, increase water in the pots or open vents slightly. Regularly monitor levels using the digital display and adjust as needed to maintain optimal conditions throughout the incubation cycle.
9.2 Addressing Egg Turning Malfunctions
If the egg turner stops functioning, ensure the power cord is securely connected to both the turner and the incubator. Check for obstructions like misaligned eggs or debris. Verify the turner’s alignment with the incubator’s base. If issues persist, consult the user manual or contact customer support for assistance. Regular maintenance and proper assembly are key to ensuring smooth operation and preventing malfunctions during the critical incubation period.
Frequently Asked Questions
The Nurture Right 360 Incubator FAQs cover common queries about operation, maintenance, and troubleshooting. Topics include egg insertion, turning mechanisms, and resolving temperature or humidity issues.
10.1 General Usage and Maintenance Queries
Common questions about the Nurture Right 360 Incubator include optimal operating temperatures, humidity levels, and egg placement. Users often inquire about cleaning procedures and the importance of maintaining stable environmental conditions. The incubator requires regular disinfection and proper water pot management. Troubleshooting tips for temperature fluctuations and egg turning malfunctions are also frequently requested. Ensuring the incubator is placed in a room with consistent temperatures (74-80°F) is crucial for high hatch rates. Proper maintenance ensures longevity and reliability.
10.2 Tips for Optimizing Hatch Rates
To maximize hatch rates with the Nurture Right 360 Incubator, ensure stable temperatures (99-100°F) and humidity levels (45-55% for incubation, 70-80% during hatching). Regularly monitor the incubator’s digital displays and maintain proper water levels in the pots. Avoid sudden environmental changes and keep the incubator in a draft-free room. Clean and sanitize the unit thoroughly between uses to prevent contamination. Always follow the recommended egg turning and candling schedules to support healthy embryo development and achieve successful hatching outcomes.

Additional Resources
Access the Nurture Right 360 User Manual and instructional videos for detailed setup and operation guides. Visit the support page for troubleshooting and FAQs.
11.1 Downloading the User Manual
The Nurture Right 360 User Manual is available for download as a PDF from the official Manna Pro website or authorized retailers like Tractor Supply Co. This comprehensive guide provides detailed instructions on incubator setup, operation, and maintenance. It covers topics such as temperature control, humidity management, and troubleshooting common issues. Ensure you download the latest version for accurate information. The manual is essential for optimal use of the incubator and achieving successful hatch rates.
11.2 Accessing Online Tutorials and Guides
Online tutorials and guides for the Nurture Right 360 Incubator are available on platforms like YouTube and the official Manna Pro website; These resources provide step-by-step instructions for setup, operation, and troubleshooting. Videos cover topics such as temperature control, humidity management, and egg turning. Additionally, detailed guides on the Tractor Supply Co. website offer tips for optimizing hatch rates. These resources are invaluable for both new and experienced users, ensuring the best results for incubation and hatching.