
Welcome to the official guide for the Zoom H1 Handy Recorder, designed to help you master its features, operation, and troubleshooting. This manual ensures optimal performance and ease of use.
Overview of the Zoom H1 Handy Recorder
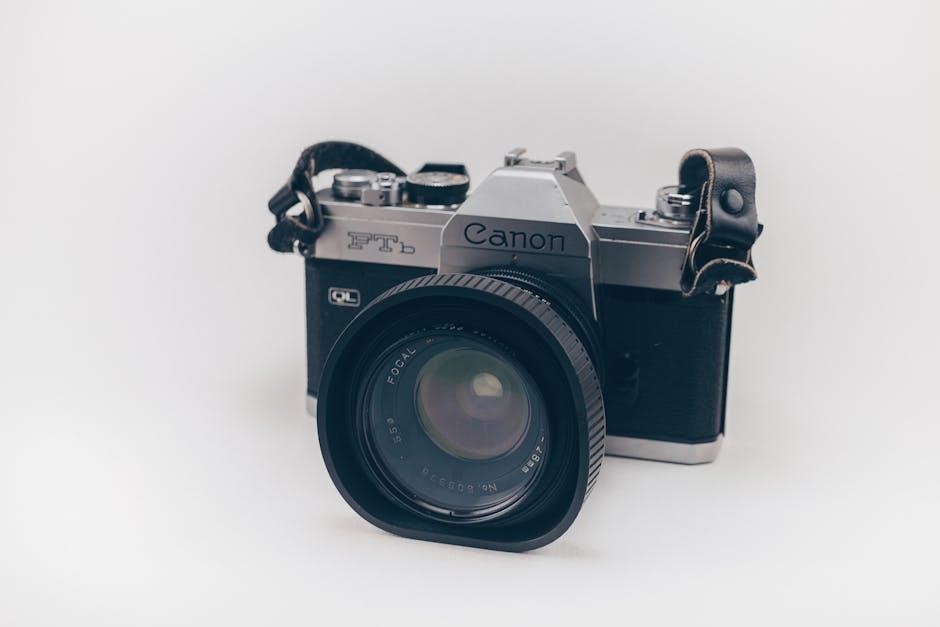
The Zoom H1 Handy Recorder is a compact, portable device designed for high-quality audio recording. It features built-in XY stereo microphones, capturing clear and detailed sound. Ideal for interviews, field recording, and rehearsals, the H1 is user-friendly and versatile. With support for up to 32-bit float WAV files, it ensures excellent audio quality. The device comes with a 16GB SD card, providing ample storage for recordings. Its lightweight design and intuitive controls make it a reliable choice for professionals and hobbyists alike, offering exceptional performance in various recording environments.
Importance of Reading the Manual
Reading the Zoom H1 instruction manual is crucial for safe and effective operation. It provides essential information on safety precautions, understanding warning symbols, and proper usage guidelines. The manual helps users navigate advanced features, optimize settings, and troubleshoot common issues. By following the instructions, you can prevent accidents, ensure high-quality recordings, and extend the device’s lifespan. Familiarizing yourself with the manual guarantees a seamless experience, whether you’re recording in stereo or mono, using external mics, or managing SD cards for storage.

What’s Included in the Box
- ZOOM H1 Handy Recorder
- Power Supply
- USB Lead
- 16GB SD Card
These components ensure you’re ready to start recording right out of the box.
ZOOM H1 Device
The ZOOM H1 is a compact, portable recorder designed for high-quality audio capture. Featuring a built-in XY microphone, it records in stereo or mono with 24-bit/96kHz resolution. Lightweight and durable, it’s ideal for musicians, journalists, and content creators. The intuitive interface offers easy navigation, while the 1.25-inch monochrome LCD provides clear visibility. With a microSD card slot and long battery life, the H1 is a versatile tool for various recording needs, ensuring professional-grade sound in a user-friendly format.
Power Supply
The Zoom H1 is powered by a single AA battery, offering up to 10 hours of continuous recording. It also supports USB bus power for convenient charging via a computer. The device includes a power supply for direct AC power connection, ensuring uninterrupted operation. Battery life is efficiently managed, with indicators for low, full, or charging status. This versatile power system makes the H1 ideal for both portable and stationary use, providing reliable performance in various recording environments.
USB Lead
The USB lead provided with the Zoom H1 enables seamless connectivity to computers for data transfer and charging. It supports high-speed USB 2.0, ensuring quick file transfers of WAV or MP3 recordings. The lead also allows the H1 to function as a USB microphone, directly capturing audio to a computer. Additionally, it serves as a power source, charging the battery when connected. This versatile USB lead enhances the H1’s functionality, making it an essential accessory for both recording and computer-based applications.
16GB SD Card
The included 16GB SD card provides ample storage for high-quality audio recordings. It supports various formats, including WAV and MP3, ensuring versatility for different projects. With the ability to store up to 200 hours of audio, the card is ideal for extended recording sessions. It is pre-formatted for optimal performance with the Zoom H1, ensuring reliability and seamless data retrieval. This SD card is a crucial component, enabling users to capture and store their audio with ease and efficiency.
Safety and Operation Precautions
Read all warnings and cautions to prevent accidents. Avoid exposure to extreme temperatures and humidity. Handle the device with care to prevent damage. Follow manufacturer guidelines.
Understanding Warning Symbols
The Zoom H1 manual uses specific symbols to highlight critical safety and operational information. These symbols, such as a lightning bolt or exclamation mark, indicate potential risks or precautions. Pay close attention to these warnings to avoid accidents or damage to the device. They are designed to guide safe usage, ensuring optimal performance and longevity of the recorder. Always refer to the manual for detailed explanations of these symbols to fully understand their meaning and importance in operating your Zoom H1 effectively.
General Safety Guidelines
Always handle the Zoom H1 with care to avoid damage. Keep it away from extreme temperatures, moisture, and direct sunlight. Use only genuine Zoom accessories to prevent malfunctions. Ensure the device is dry before use to avoid electrical issues. Avoid touching metal parts to prevent static electricity damage. Store the recorder in a protective case when not in use. Follow battery guidelines carefully, and dispose of batteries properly. Read this manual thoroughly to understand all safety measures and operational precautions for optimal performance and longevity of your Zoom H1 Handy Recorder.
Setting Up the Zoom H1
Start by inserting the battery and SD card, then connect via USB for charging and file transfer. Follow the quick start guide for easy setup.
First-Time Use Checklist
Welcome to your Zoom H1 Handy Recorder! Before using your device, follow these steps:
- Unbox and inspect all included accessories.
- Install the AA battery provided for initial power.
- Insert the 16GB SD card into the card slot.
- Connect the H1 to your computer via USB for charging and file transfer.
- Review the quick start guide for basic operations.
- Test the device by recording a short audio sample.
This checklist ensures a smooth start with your Zoom H1 Handy Recorder.
Basic Device Settings
Before using your Zoom H1, configure these essential settings:
- Insert the SD card into the slot to store recordings.
- Install the AA battery for power or use the USB lead for charging.
- Power on the device using the button on the front.
- Adjust the volume levels using the control buttons.
- Navigate the LCD menu to customize settings like recording format and mic sensitivity.
Proper setup ensures optimal performance and easy operation of your Zoom H1 Handy Recorder.

Recording Modes and Formats
The Zoom H1 offers versatile recording modes, including stereo and mono options, to suit various audio-capture needs. Supported formats like WAV and MP3 ensure high-quality recordings.
Stereo vs. Mono Recording
Understanding the difference between stereo and mono recording is crucial for capturing high-quality audio. Stereo recording uses two microphones to create a wide soundstage, ideal for capturing ambient sounds, interviews, and live performances. Mono recording, on the other hand, uses a single microphone and is best suited for voice memos, dictations, and situations where a focused audio source is desired. The Zoom H1 allows seamless switching between these modes, ensuring flexibility for various recording needs. Choose the right mode based on your specific application to achieve professional-grade audio.
Supported Audio Formats
The Zoom H1 supports various audio formats to meet different recording needs. It records in high-quality WAV formats, including 32-bit float, which captures a wide dynamic range. Additionally, it supports MP3 formats for smaller file sizes. The device can record WAV files at bit depths of 16 or 24 bits and sample rates up to 96 kHz, ensuring high-resolution audio. This versatility makes the H1 suitable for professional and casual use, offering flexibility in capturing and editing audio for various applications, from music to field recordings.
Accessories and Compatibility
The Zoom H1 comes with a 16GB SD card, USB lead, and power supply. It supports external microphones and is compatible with various SD cards for expanded storage.
Compatible SD Cards
The Zoom H1 supports SD, SDHC, and SDXC cards, ensuring reliable performance and storage expansion. It is compatible with cards ranging from 2GB to 32GB or 64GB, depending on the model. For optimal use, it is recommended to use high-quality, Class 10 SD cards to maintain recording stability. Always format the SD card in the device before use to prevent errors. This ensures seamless compatibility and maximizes the H1’s recording capabilities, whether for audio or other applications.
External Microphone Options
The Zoom H1 supports external microphones, offering flexibility for various recording needs. You can connect microphones via the 3.5mm input, enabling the use of lavalier, shotgun, or wireless mics. This feature is ideal for capturing high-quality audio in film, interviews, or live performances. Ensure the external microphone is compatible with the H1’s input specifications for optimal performance. Using an external mic enhances your recording capabilities, allowing you to tailor the audio capture to your specific application.

Troubleshooting Common Issues
Address common problems like device malfunction or audio issues. Check power sources, SD card functionality, and microphone connections. Consult the manual for detailed solutions and reset options.
Device Not Turning On
If the Zoom H1 does not power on, first ensure the battery is properly inserted or the power supply is connected. Check for drained or incorrect battery types. Verify the SD card is compatible and formatted correctly. If using an external power source, confirm it is functioning. Reset the device by holding the power button for 10 seconds. If issues persist, consult the manual or contact Zoom support for further assistance. Always use recommended accessories to avoid compatibility problems.
No Sound Being Recorded
If no sound is being recorded, check the volume levels and ensure the microphone is not muted. Verify that the recording mode is correctly set to either stereo or mono. Ensure the input source is properly selected and external microphones are securely connected. Check for low battery alerts, as this may affect audio capture. Review the SD card for sufficient storage space and ensure it is formatted correctly. If issues persist, restart the device or update the firmware to the latest version for optimal performance.